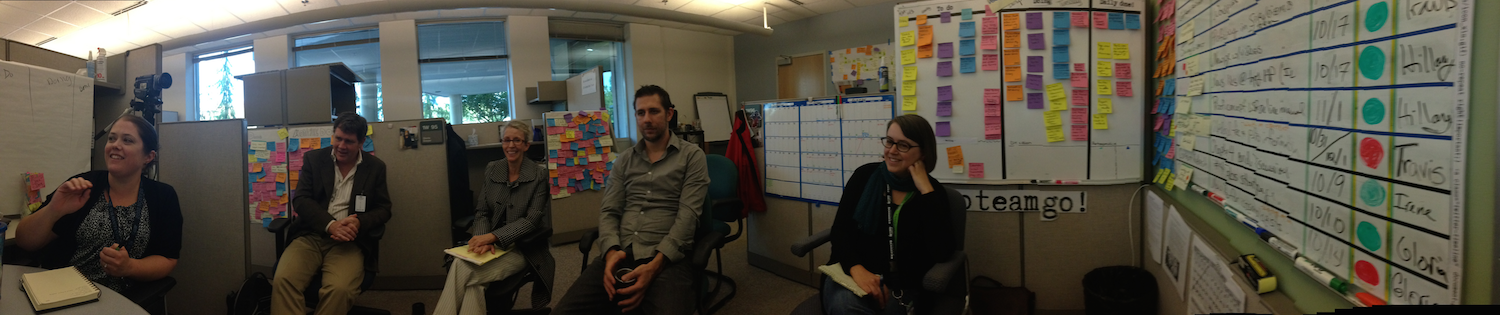
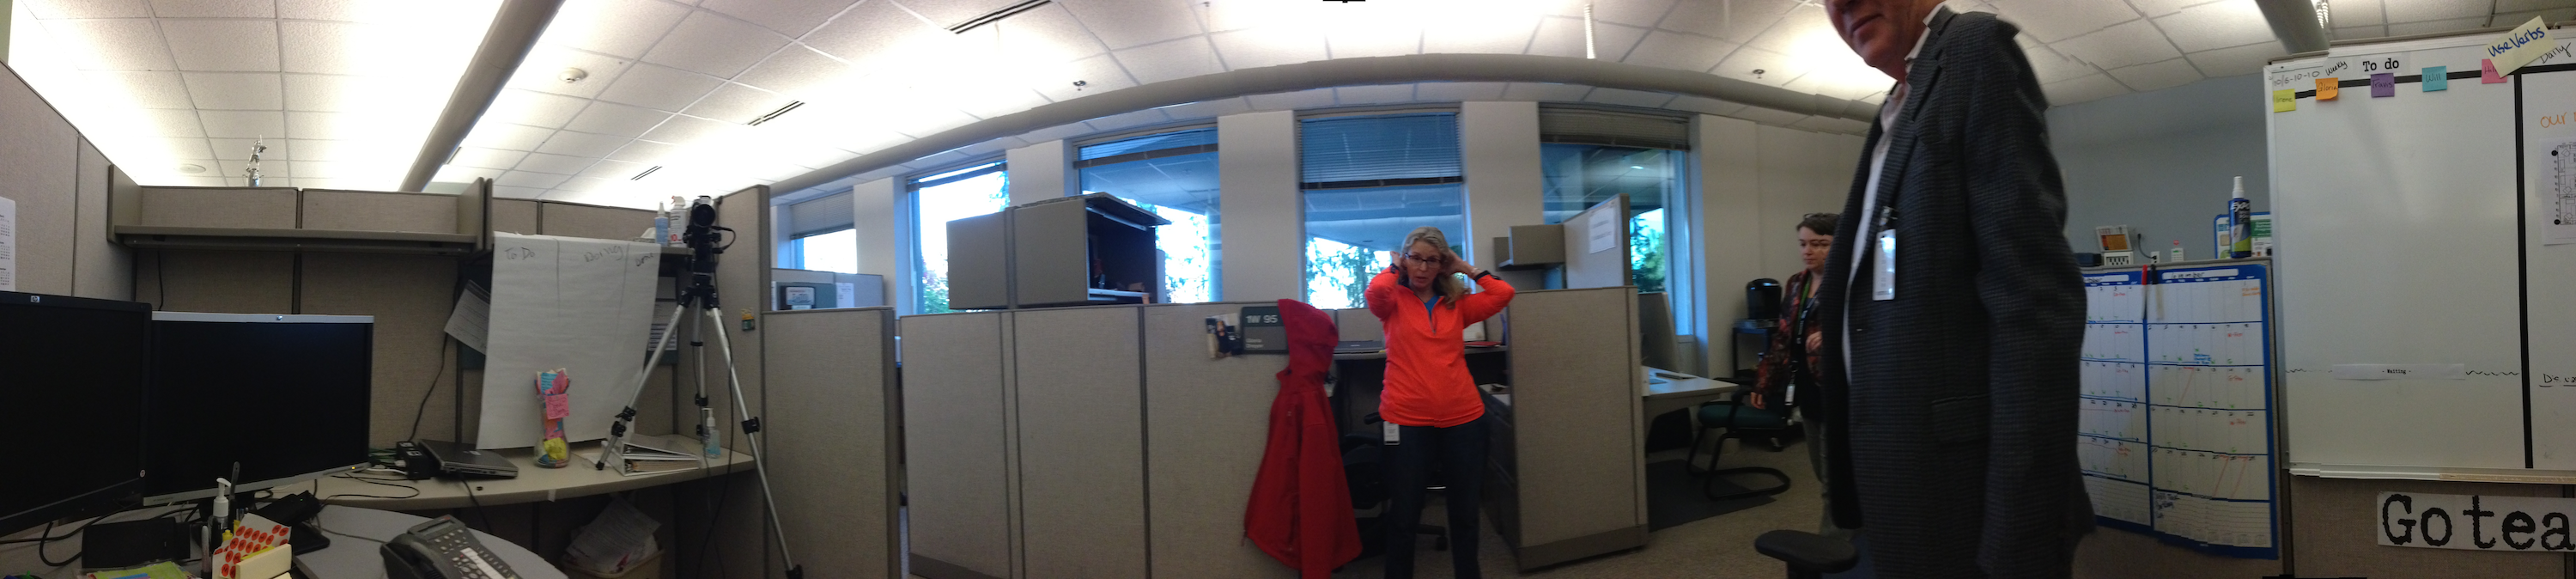
We were thrilled to be part of the Lean Transformation Conference organized by Results Washington week at the Tacoma Convention Center. Over 2,700 people attended — a sellout crowd!
Attendees at Lean Transformation
Arun Kumar, founder & CEO of Kerika, gave a presentation on both days on Distributed Lean and Agile Teams in the Public Sector, drawing upon lessons learned, case studies and best practices from multiple state agencies and private sector firms.
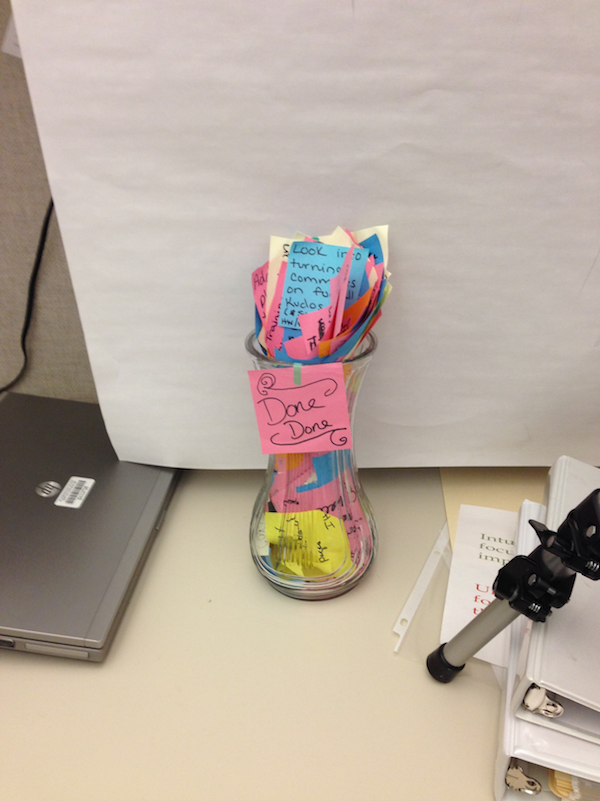
A couple of weeks ago we visited a UX team at the Washington State Department of Licensing, and took a photo of the “Post-It Palace” they had built within their cubicles:
We did a quick refresh to Kerika today, and we will be quiet for a while our development team — which is based in India — takes a well-earned Diwali break for about 2 weeks.
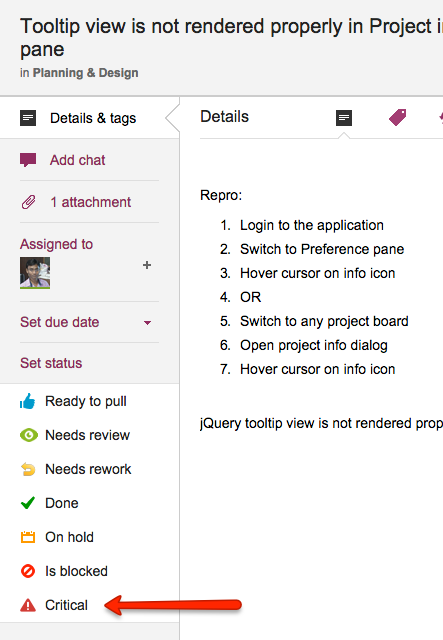
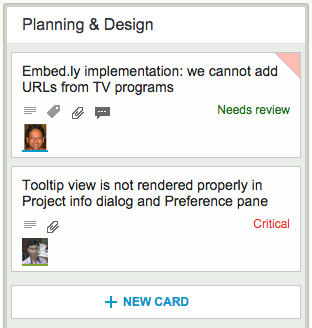
With our newest release, we have added a new status indicator that you can use to flag particularly important cards on a crowded board: “Critical”.
Critical status
The reason we added this was simple: no matter how cool and calm we try to be, every so often there’s a mini-crisis and we need to make sure that everyone takes note of some particular cards.
In the past we tried to accomplish this by use of color (e.g. Red), but this wasn’t a satisfactory solution since we want to use colors for other purposes as well.
We also tried marking critical cards as “Is blocked”, because this indicator appears in red text making it very eye-catching, but this too was not a satisfactory solution.
“Critical” works: you can highlight really important cards on a board by marking them with this status, and you can also search for Critical cards as part of Advanced Search.
We have a new feature in Kerika: a simple way to add numbers to your cards, for both Task Boards and Scrum Boards.
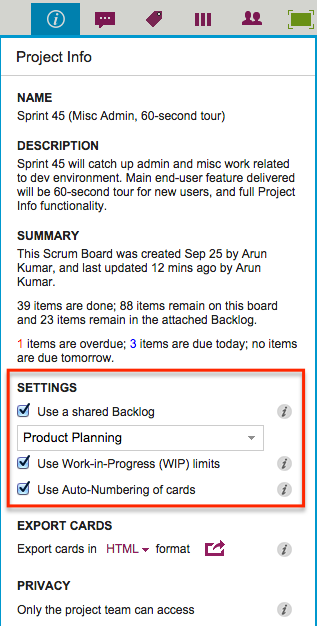
Project Leaders (and, of course, the Account Owner) can access this feature by clicking on the Project Info button, which appears on the top-right area of a Kerika board:
Settings
Auto-Numbering can be turned ON or OFF at any time.
It is a simple feature, intended primarily to help manage large numbers of cards on a single board, e.g. a Help Desk team using Kerika as a ticket management system.
In ticket management or asset tracking scenarios, the titles of many cards may be similar, e.g. “User has trouble logging in”.
A more useful way of distinguishing between cards might be through the card’s numbers, e.g. “104 User has trouble logging in” and “242 User has trouble logging in.”
When Auto-Numbering is turned ON, Kerika will automatically insert a number as a prefix to new cards that are added to that board.
Numbers are sequential: for example, the first card would have “1” added as a prefix, the second card would have “2” added as a prefix, etc.
Auto-Numbering can be stopped at any time, and then new cards added to the board won’t have numbers added to the card titles.
Auto-Numbering can be resumed after a pause, the numbering will intelligently figure out how many cards are on the board by excluding the Backlog and the Trash, as well as looking at the last number used.
The numbers are simple text, added as a prefix: they can be edited by any Team Member, and even removed.
Most users work on private projects: i.e. projects that are accessible only to people added to the project team.
But some folks find it useful to have their projects viewable by everyone, typically because they are working on nonprofit causes, like WIKISPEED.
WIKISPEED publicizes its projects because it helps attract new volunteers to their cause, and this is actually a pretty smart way for nonprofits to showcase their work.
Kerika has always had an option for people to have all their projects made viewable by the public, but even nonprofits, for example, may have some Kerika boards that they don’t want to share with the rest of the world.
Well, with our newest release, it is possible for the Project Leader (or Account Owner) to make individual projects open to the public to view.
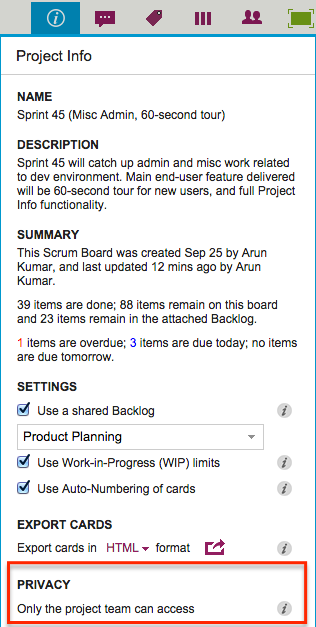
A project can be easily switched from Private to Public, and back again, using the Project Info button that’s available on the top-right of every Kerika board:
Privacy
The privacy choices are as follows:
Only the project team can access: this is the default setting, and it means that unless people are added to the project team, they won’t be able to view it — or even find it using the Search function.
Anyone, anywhere can view: this means the project is “public” — it can be found through search, and anyone who knows the URL of the project can view it. (But, they still won’t be able to make changes.)
When a project is made Public, all the documents contained within it — on all the cards and canvases that make up that board — are also made viewable to the public.
This means, for example, that if your Kerika+GoogleWhiteboard or Task Board is made available to the public, all the documents in that board’s Google Docs folder are also made viewable by the public.
(And Google indexes all public Google Docs, the project could be found in more than one way, depending upon who is searching for it.)
One caveat: users of premium Google Apps, e.g. Google Apps for Business, cannot make their projects open to the public, because of limitations imposed by Google.
When we first started working on Kerika, it seemed to us that everyone who wanted to use an online project board fell into one of two camps that didn’t overlap:
Kanban users, who wanted a simple Task Board, perhaps with nothing more than To Do, Doing, and Done columns.
Scrum users, who wanted to share Backlogs across multiple Scrum Boards, with each Scrum Board representing a different Scrum iteration (i.e. “Sprint”).
Folks who wanted to work in Kanban-style – typically business users – seemed to have little use for Scrum, and people who wanted to work in Agile-style – typically IT folks – didn’t show much interest in Kanban.
So, we built Kerika with support for Task Boards, for Lean/Kanban users, and Scrum Boards, for Agile users.
What we are seeing more recently, however, is spectrum of usage patterns and styles within organizations:
A project that starts off as a Kanban Board might need to become a Scrum Board in the future: as the team works on the project, it may conclude that a series of Sprints/iterations is a better model than a continuous flow/Kanban model, and they may need to transform their Kanban Board to a series of Scrum Boards.
A team might start off working with Scrum Boards, thinking that Agile is the ideal model for their work, and then find that a Kanban model of continuous flow is better suited for their needs, in which case they may need to change from a Task Board to a Scrum Board.
A Scrum team may need to pull items from multiple Backlogs: there may be items from a Marketing Backlog and from a Product Development Backlog that need to get worked on in the same Sprint, so the team may need to switch from one Backlog to another.
This kind of flexibility wasn’t available in Kerika before — and is certainly not available in Trello, Asana, Basecamp or any other tools that compete with Kerika — and that’s exactly the problem that we have fixed with the new release!
Use the Project Info button, on the top-right of the Kerika menu bar, to switch a board from Kanban to Scrum, or vice versa:
Settings
If you check the “Use a shared Backlog” box, you can then select the Backlog you want to use for your board: if you had been working in a Kanban board, it automatically switches over to a Scrum Board.
At any time you can switch between any of the Backlogs that exist in the Account, that you have permission to access.
If you want to go back to working in Kanban-style, just uncheck the “Use a shared Backlog” box and the Backlog will disappear from view.
It’s now that simple to choose between Kanban and Scrum!
Cayzen Technologies organized a Lunch & Learn Agile event at the Harbor House at Percival Landing in Olympia, Washington, featuring Arun Kumar, CEO of Kerika.
Arun’s topic was Implementing Lean across Distributed Teams, and we would like to specially thank Mayra Pena from Cayzen who organized the event:
Arun Kumar & Mayra Pena
The event was attended by folks from Washington State’s Employment Security Department and Department of Health, among others, and there was a lively discussion.
Here are the slides from that presentation:
If you would like to see the sample Kerika board that featured in the demo, go to https://kerika.com/m/H51M
We are thrilled to announce a great new feature: Work-In-Progress (WIP) Limits for Kanban Boards and Scrum Boards.
WIP Limits are a very helpful tool when you are working in a true Kanban style: where work gets “pulled” as people become free, rather than work getting “pushed” onto people before the people ready.
To understand the difference between “push” vs. “pull”, think back to that famous episode of “I Love Lucy” where Lucy and Ethel take up jobs at a chocolate factory, and quickly find themselves unable to keep up with all the work that’s getting pushed onto them:
This is a perfect example of the perils of “push”: as the chocolate gets prepared upstream, the work becomes ready even though the people aren’t ready for the work.
If you push work on to people who aren’t ready to take it on, you will quickly have disastrous results. (It’s funny only when it’s on TV and it involves Lucy.)
At the very least, you will have an imperfect understanding of what each person is actually doing, if people upstream in the project’s workflow simply push work downstream as soon as the upstream folks are done with it.
A pull model is different: people “pull” work and assign it to themselves when they are ready.
Each person typically has a small number of items they are juggling at any time: it may be as few as two items, depending upon the complexity of the work, but it is rarely as few as just one item.
(You nearly always want to have one “background” task ready to be picked up whenever your “foreground” task gets blocked for any reason.)
When a person is able to take on a new task, she can “pull” a card from the column to the left of her on a Kerika board.
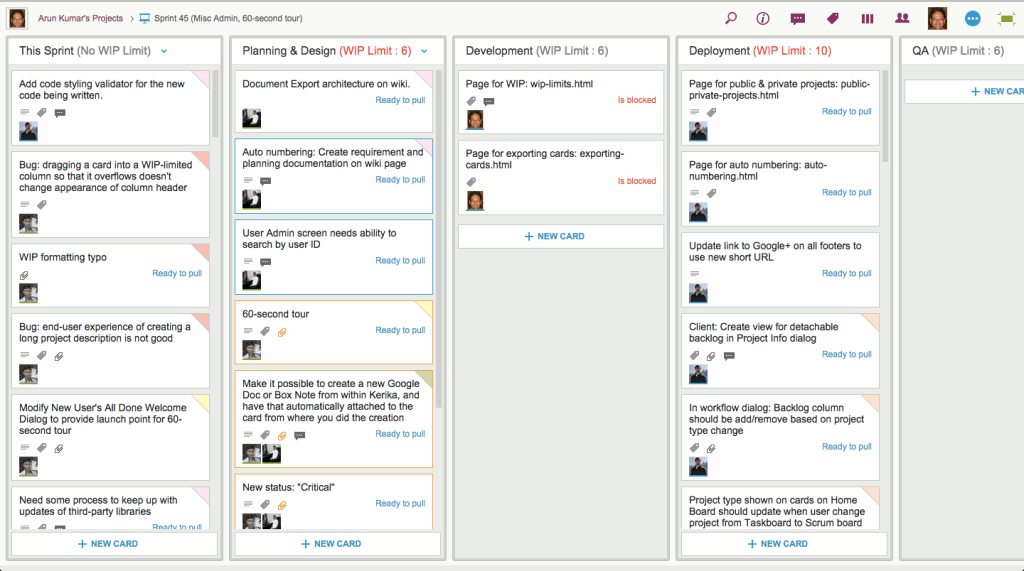
Here’s a simple example, reflecting the workflow for a software project:
WIP Workflow Example
This project includes people with different roles: designers, developers and QA, and each group has determined it’s own WIP limits, based upon the team’s capacity and velocity.
In this particular example, we can see that the Planning & Design and Deployment columns have currently exceeded their WIP limits (and, in the case of Deployment, by a large margin!)
When this happens, Kerika alerts you to the condition by showing the affected columns with red text in the column headers:
Example board with WIP exceeded
WIP Limits as “soft limits”: Kerika doesn’t stop you from exceeding a column’s WIP Limit, but it does provide a very clear, visible warning to everyone that a bottleneck is about to form.
When bottlenecks start to form, the Project Leader should intervene and help manage the upstream flow so that the WIP Limit can come back to its acceptable amount.
WIP Limits originated in Kanban, but Kerika lets you use them for Scrum Boards as well!
To use WIP Limits, click on the Project Info button that’s at the top-right of the Task Board or Scrum Board: