For some segments of our users, e.g. college students using Kerika for their course projects, it makes sense to treat each user as an independent entity, since the relationships between these students will vary from class to class, from semester to semester.
These collaboration networks are very dynamic, and it’s impossible to predict whether a team that got together to work on a three-month class project will stick together after that project is over, or work as the same group of people on the next class project.
In business environments (companies, nonprofits and government agencies), however, the teams are more stable: people don’t change jobs every few months. But, turnover can still be a problem: if Joe leaves your company, how can you be sure that all the boards and documents that Joe had created are not lost along when Joe is gone?
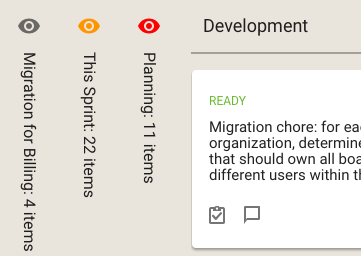
The simple solution to this is to use service accounts to own all the boards that are being used by a community of users, like a department or even the entire company (if the company is small enough).
A service account looks like any other Kerika account — it is associated with it’s own email, e.g. kerika@example.com — but it isn’t actually a real person: the email will have been set up by the organization’s IT staff or management, and the password is typically shared between a small handful of supervisory people.
Unlike real people, service accounts will always stick around: they won’t retire, resign, or get run over by a bus…
This means the organization has continuity and security with respect to it’s Kerika boards and documents: because the project assets are owned by kerika@example.com, rather than joe@example.com, it doesn’t matter whether Joe is still working at the company or not.
We encourage all our professional users — people working in companies, nonprofits and governments — to set up service accounts as a best practice, and we can help you: just email us at support@kerika.com and we will do all the account consolidation for you:
- All the boards owned by the people in your organization will be transferred to the ownership of the service account instead.
- Everything about each board is preserved as part of the transfer: all the cards, canvases, due dates, etc. remain the same after the transfer; it’s just that the boards are no longer owned by joe@example.com and susan@example.com, but instead are now owned by kerika@example.com
- You can decide who to consolidate within the service account: typically it is everyone in the organization, but if you have different departments or cost centers, it will make sense to have more than one service account — one for each department or cost center.
- After the consolidation, individual users within your organization will no longer have separate accounts: their Kerika identity, preferences, history, etc. are all preserved, but instead of working in several different accounts, they will all be working in a single service account, that’s under the control of your organization.
- All this can be done by us, overnight: the next day your users can come into work and login as they did before, and have access to all the boards they had the previous day. All the boards will look the same, and your users can pick exactly where they left off.
When users have been consolidated within a service account, any new boards that they create will automatically be owned by that service account, rather than by the individual users. This ensures that all current and all future project assets are owned by the service account, i.e. by the company, rather than by individual users.
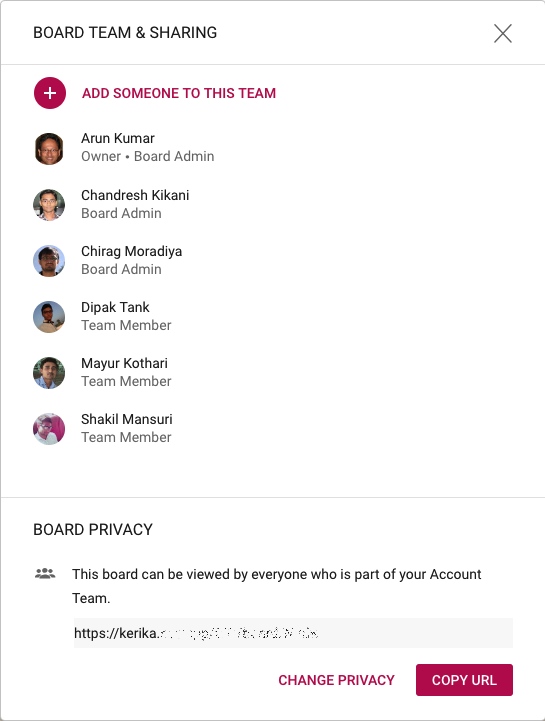
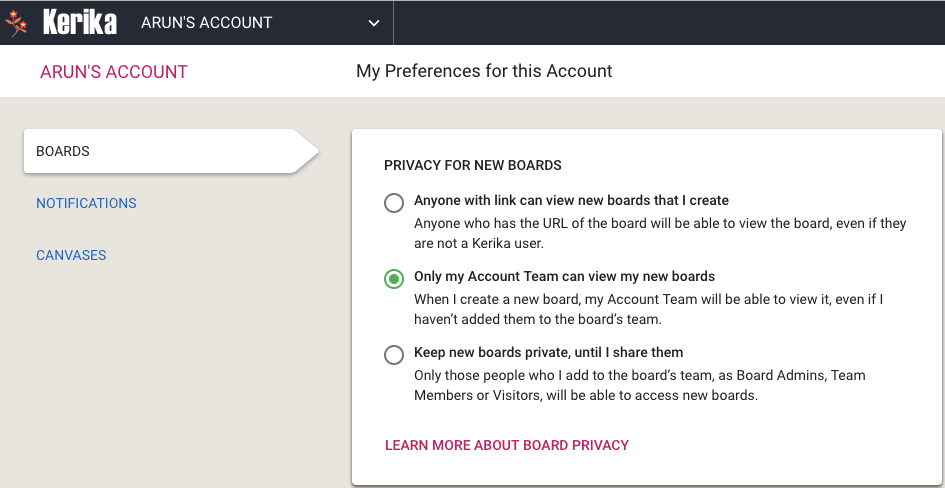
It’s still possible for individual users to have privacy within the service account: for sensitive work (e.g. personnel matters) they can adjust the privacy of individual boards to be “share with board team only”. When the privacy is set to board team only, the board will be visible only to the people who are specifically added by the Board Admins to the board’s team.
The Account Owner, i.e. the service account, will always have access to every board within that account, regardless of the board’s privacy settings. This is consistent with how other organizational assets are currently managed: if you have a work email, for example, you expect to have privacy from your coworkers, but you know that the company’s IT department will always have access to your email if they need it — and your email doesn’t really belong to you, but to your employer.