All posts by user

Shock, horror: Harvard divests 0.03% of its equity portfolio; Apple must be going out of business?

It isn’t hard to see example of “Apple-bashing” in the press these days: just take a look at Bloomberg’s website where the top headline in its Personal Finance section, for the past three days running, is entitled “Harvard Liquidates Apple Stake After IPhone Sales Lose Steam”.

If you read past the headline, the second paragraph lays it all out in devastating detail: Harvard has sold a grand total of $304,000 in Apple shares (about 571 shares at a price of $573), which represents 0.03% of its equity portfolio (and about 0.1% of its total endowment).


Our new version adds Tagging

As Kerika gets adopted by larger teams, working on larger and more complex projects, we have seen an increasing need to create filtered views of projects.

To make this easy, in the usual Kerika style, we are adding Tagging as the main new feature in our next release. This video will give you a quick overview of how tagging works in Kerika:

The concepts behind tagging are simple:

  • Every project board can have its own set of tags, and tags can also be added to templates if you want them to be part of your regular workflow.
  • Every Project Leader and Team Member can add new tags, apply tags, or remove tags.
  • A quick filter capability lets you easily see which items on a board match specific tags.
  • If you are working on a Scrum board, tags are integrated with your Backlogs: bringing a card in from a Backlog will automatically add the tags for that card to your current project board.
  • Tags are always converted to lower-case, and are not case-sensitive: i.e. “Server” becomes “server”. You cannot add duplicate tags to a board, so, for example, you can’t have “Server” and “server” as tags within a board since they are both considered the same.

There are a bunch of other improvements in the new version, of course, but tagging is the one you will see right away! Let us know what you think…


Facebook Home on Android: a great way to monetize the addicts

In many industries, a small proportion of the users will consume a disproportionate amount of the product, and will provide the vast bulk of a company’s profit.

This is true in the beer business for example: the beer companies have long known that a small percentage of their customers will drink a vast amount of beer every day. (This factoid used to be a staple of marketing classes in the 1980s, when it was offered as an example of the 80:20 rule — 20% of the consumers will drink 80% of the beer. Which actually amounts to about a case of beer a day…)

It is also true for Software-as-a-Service (SaaS) businesses: Forbes reported in 2011, for example, that just 4% of Dropbox’s users pay for the service, and yet Dropbox is a growing, profitable company! The other 96% contribute indirectly, by adding to the network effect and recruiting others who have a 4% probability of becoming a paid-up subscriber of Dropbox.

These percentages can seem small, but they can quickly add up when you have millions of users.

Facebook has a similar profile of users: a small number of people are logged in obsessively, and these will provide the bulk of their advertising revenues — not just because they are more like to see the advertisements, but because they are more likely to view Facebook as a trusted source of useful content.

In this context, creating Facebook Home on Android makes a lot of sense: it doesn’t matter whether a very large proportion of your user base never uses it, if you can get the addicted segment to be logged in all the time. These people will drink all the beer you are selling.

Making sure you never miss a project update

In addition to the styling changes we have made, we have also been working to make sure you always have easy access to your project updates, by improving and extending the onscreen notifications you get from Kerika. There are a whole bunch of improvements in our newest version:

  • Kerika reminds you when you are hiding a column on a task board: using the Workflow button, you can always personalize your view of a task board, hiding some columns if they are not of interest. Now, Kerika makes sure you don’t forget that you have some columns hidden, by showing a small indicator above the Workflow button:

    Indicator that you are hiding some columns on your task board
    Indicator that you are hiding some columns on your task board
  • And, if there are updates to cards on columns that you are hiding, these will never get missed:
    Updates on cards that I am not viewing
    Updates on cards that I am not viewing

    Clicking on the Workflow button will show you clearly which hidden columns have updates:

    Updates on hidden cards
    Updates on hidden cards

    In the example above, the “This Sprint” and “In Development” columns are currently hidden from view, and there are updates to cards on the “In Development” column.

  • If you have several projects underway, Kerika makes it easier than ever to know which of them have updates that you haven’t seen. This is done in two places in the user interface: first, your project tabs show orange indicators when there are unread notifications:
    Updates are highlighted on project tabs
    Updates are highlighted on project tabs

    And, when you are browsing your list of projects, you see orange highlights on the project cards as well, to let you know there are unread updates:

    Updates are highlighted on project cards
    Updates are highlighted on project cards
  • And, finally, a new feature makes it easy for you to find updated cards within columns, which is especially useful when you are dealing with a lot of cards, e.g. in a Product Backlog:

    Finding the next updated card in a column
    Finding the next updated card in a column

As with all our product improvements, the Kerika team has been testing the changes extensively by “dogfooding” the software: we use Kerika for all of our work, and we have been very pleased with these improvements which have really improved our own team productivity!


A cleaner look to Kerika: more open, more fun, and with clearer highlights

We have some styling changes in our latest version of Kerika, which we think makes the user interface seem more open and inviting, and makes it even easier to see highlights and notifications.

The new styling is something that we had been mulling over for a while: a number of users had said that the old styling was a little “too grey” (our thanks to Yakup Trana for being among the earliest to provide this feedback). The new styling essentially reverses the old look of grey cards on a white background.

The new look for your project cards is like this:

New look for project cards

The cards are easier to read, and more clearly defined. (We have also tweaked the color of the grey border around the cards, to make it slightly darker which makes for a crisper look.) A lot of the old horizontal lines have been removed as well, which makes for a cleaner look. By contrast, this is the old styling:

Old view of project cards

The contrast between the two is quite dramatic: the new Kerika is a lot cleaner and more inviting!

The new look for your task cards is like this:

New view of task cards

Task cards are easier to read, and the important highlights and notifications are also more crisply delivered. Here, by contrast, is the old Kerika styling:

Old view of task cards

Once again, a dramatic contrast, and clearly for the better! We have been testing this new styling within the Kerika team for the past 3 weeks, and have been continually tweaking it on a daily basis. We now feel it is the best we can do! Let us know what you think.

Google Plus doesn’t seem to like TIFF files; Mac’s Grab and Preview utilities are more annoying than ever…

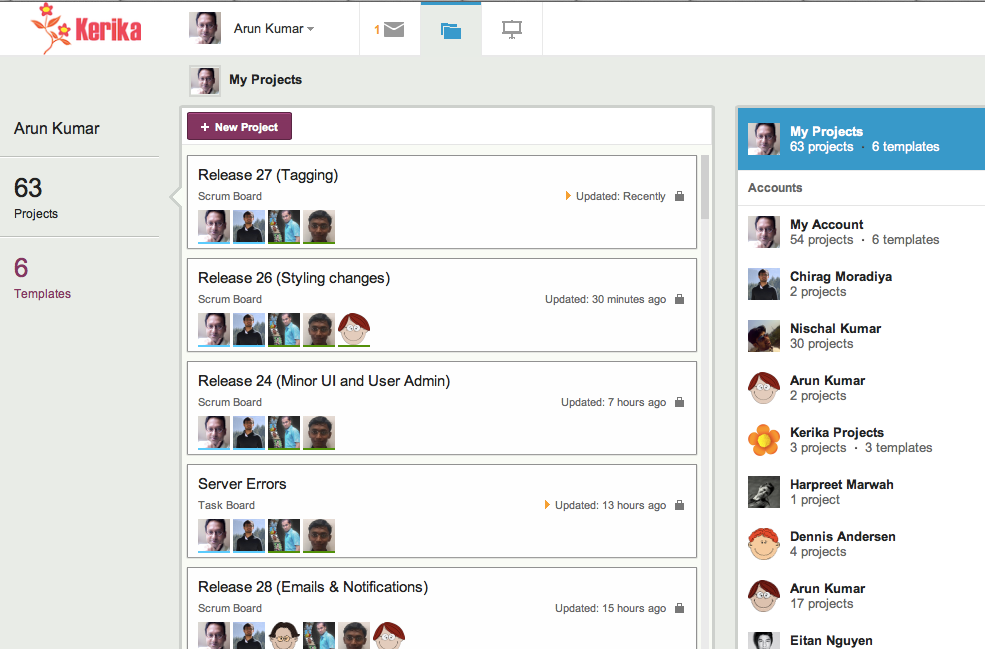
We just encountered a weird bug in Google+: after being prompted over several days to upload a larger image as our cover photo, we decided to get a larger screenshot of the Kerika application.

On a Mac, there are several ways of doing this, but the most direct way is to use Mac’s Grab utility. This utility used to be a lot easier to use before Mountain Lion’s “improvements”: now, Grab disappears after you switch to another application, using the Cmd-Tab keys, which is really annoying because you have to relaunch it all the time.

But, that isn’t really our main beef right now… One long-standing annoyance of Grab is that it saves files in the TIFF format. We have no idea why: TIFF seems like a really ancient format these days.

If you try to upload a TIFF file to Google+, however, the file shows up inverted for some reason. This seems to be a weird bug on Google’s part: TIFF files, alone, are being inverted when they are uploaded.

To get around this, you have to save your TIFF-based screenshot as a PNG file (or JPEG, but then you have to make sure you don’t lose resolution in the process). This means opening the TIFF file in your Mac’s Preview utility, and then trying to save that as a PNG file.

Saving a file as a different type used to be simple with the old Preview, but no more: another one of Apple’s annoying “improvements” has been to eliminate the “Save As…” option from Preview’s File menu. So, you have to do something completely counter-intuitive: you need to duplicate the file, using the Duplicate option of the File menu, and then close that new window. Closing the new window alarms Preview enough to prompt you to save the file, at which point you are finally presented with a dialog box that lets you select the file type you want.

And then it’s back to Google+ to upload your new PNG screenshot…

Google and Apple are considered the leaders in usability, so there we have it: this is the state of the art!

Agile for large and distributed teams: conversations with Al Shalloway, Mike DeAngelo and the Wikispeed team

Three great conversations about Agile and Scrum in recent days, with Al Shalloway of the Lean Software and Systems Consortium in Seattle; Mike DeAngelo, Deputy CIO of the State of Washington; and Clay Osterman and Joe Justice from Team WIKISPEED in Lynnwood. Common threads in these conversations:

  • Scaling up Scrum to large projects (e.g. the global WIKISPEED team numbers close to 300 people), and
  • Adapting Scrum for distributed teams (where people are located in multiple offices).

Agile purists might well recoil at the prospect of Scrum teams that can’t be fed with a single large pizza (the traditional rule-of-thumb for the optimal team size, still followed at companies like Amazon) or having to deal with people in multiple locations that can’t have face-to-face contact., but these are real-world problems for many organizations, and simply saying “No”, because the idea of very large or distributed teams offends one’s theology about Agile, isn’t a useful stance to take.

Increasingly, large organizations are distributed across cities, timezones, and even continents, and complex systems require large delivery teams. A pragmatic approach is necessary, not a purist one: we need to consider how we can adapt the basic principles of Scrum to meet the real-world needs of large organizations. Here are some lessons learned over the years in how to adapt Scrum for large or distributed teams:

  • Let multiple project teams push/pull items from a single Backlog, so that many small teams can work in parallel on a single system, rather than a single, large team take on the entire Backlog. This requires coordination among the various teams through a “Scrum of Scrums”: each individual team does it’s Daily Standup, and then the Scrum Masters of each team participate in a second meta-Standup where they report to each other on their particular teams’ progress and impediments.
    To succeed, you need project tools that make it very easy to have multiple teams push and pull items from a single Backlog. The project management system must make it easy for any any member of any team to have real-time visibility into the progress of every other team, so that the task of managing dependencies can be pushed down to individual team members rather than concentrated within the Scrum Masters. (Leaving it up to the Scrum Masters alone to manage all the inter-dependencies leaves you with the same single-point-of-failure that you have with traditional Waterfall approaches.)
  • Try stay within the “1 large pizza” size for individual teams. There’s a simple, practical reason why you should avoid having individual teams become much more than 8 in number: the Daily Standup takes too long, and people start to either under-report, or tune out much of the discussion.

    If a team has 20 people for example, and each person simply took 30 seconds to say what they had done, 30 seconds for what they plan to do next, and 30 seconds to describe impediments, that still adds up to a 30-minute long Standup!

    When faced with a Daily Standup that has become something of an ordeal, people tend to under-report, as a coping mechanism, and, frequently, what they under-report (under-discuss?) are the impediments.

    This can be fatal to the team’s overall success: problems and worries are not discussed very well, and eventually accumulate to the point where they become fatally large.

  • Split up the work, not the team. If your people are distributed across multiple locations, it is far better to split up the work rather than the teams: in other words, give each location a different set of deliverables, rather than try to get people working in several locations to work on the same deliverables.
    Too many organizations, particularly when they first built onshore-offshore teams, cling to the myth of “following the sun”: the idea that a team in India, for example, could work on a deliverable during Indian working hours, and then hand that work off at the end of the day to a California-based team that is conveniently 12-hours away.

    This is the myth of continuous work: the notion that the same deliverable can effectively be worked on 24 hours a day, by having two shifts of people work on it in non-overlapping timezones.This simply doesn’t work for most knowledge-intensive professions, like software development or product design.

    A huge effort is needed to hand over work at the end of each workday, and invariably there is a significant impact upon the work-life balance of the people involved: either the India team or the California team, in our example, would have to sacrifice their evenings in order to accommodate regular phone calls with the other team. Eventually (sooner rather than later), people get burned out by having their workdays extend into their evenings on a regular basis, and you are faced with high turnover.
    Splitting up the work means you can have loosely-coupled teams, where there isn’t the same burden of keeping every person aligned on a daily basis. A project tool that makes it easy for everyone to have a real-time view of everyone else’s work is essential, of course, but you no longer have to have Standups that would otherwise easily take up an hour each day.

What do you think? Let us know your best practices!

A comprehensive template for implementing an Electronic Health Records system

With help from Paul Seville, MD, MBI, CSM, (who, by the way is a very impressive guy: experienced physician turned informatist!) Kerika is now offering a comprehensive process template for medical practices that need to implement an Electronic Health Records system: the template deals with all the stages of an EHR implementation, as recommended by the authoritative folks over at HealthIT.gov:

  • Stage 1: Assess Practice Readiness. This comes with 7 cards, representing the key work items needed to complete this stage.
  • Stage 2: Plan your Approach. 9 work items that include document templates for analyzing and mapping your practice’s current and future workflow.
  • Stage 3: Select or Upgrade to a EHR. 8 cards along with templates for evaluating vendors.
  • Stage 4: Conduct Training & Implement EHR. Checklists and templates for test plans for the implementation stage.
  • Stage 5: Achieve Meaningful Use. This is the most critical phase of implementing an EHR, of course, and we have cards for each of the 15 “Core Measures” and each of the 10 “Menu Measures” recommended by the government.
  • Stage 6: Continue Quality Improvement. This includes templates for conducting patient surveys.

This is the master process template for health informatics: over the coming days we will be providing more focused templates for each of the sub-projects involved in deploying an EHR: for example, templates for each of the Meaningful Use measures.

This project template includes a large number of document templates for the individual work items (e.g. a spreadsheet that you can use to evaluate EHR vendors). All document templates are available in Microsoft Office format as well through Google Docs.

These templates are available to everyone, right now: when you start a new project, you will find “Implementing an EHR” among the choices for Task Board projects:

Selecting a process template

When you use a Kerika project template, you also get copies of all the document templates that are part of the project template. These are copied into your own Google Drive account, and can be shared with others on your project team.

Please let us know know what other templates you would like to see! (And our thanks to Dr. Seville for help with this particular template.)

Installing Kerika from the Google Apps Marketplace

If your organization is using a premium edition of Google Apps (i.e., a paid version of Google Docs), then you can install Kerika from the Google Apps Marketplace. This can be done by any user within your Google Apps domain, provided this checkbox is checked (click on the image below to see a larger version):

Allowing users to install Kerika from the Google Apps Marketplace

This checkbox is usually checked — that’s the default setting, anyway — but some domain administrators may have turned off the ability of individual users to add Google Apps on their own initiative. If this is the situation with your organization, please contact your IT department and ask them to install Kerika for you. Or, you can always just sign in at Kerika.com or install it from the Chrome Web Store.